The below are the official/original H-06 modules from Guangzhou Huicheng Information Technology Co., Ltd. (HC Huicheng Information for short) / Wavesen. The latest version has firmware hc01.comV2.0 and a blue LED but there are still many of the older versions around with firmware linvorV1.8, no blue LED. Both work the same. The newer firmware has a couple of new AT commands.
There are many modules advertised as HC-06 and HC-06 compatible, however, the originals from Guangzhou Huicheng Information have the HC logo on the PCB. Although I normally recommend trying to find the official modules, the SPP profile the HC-06 uses is fairly simple and copies and compatible modules work just as well. Not so for the HC-05 though. If all you need is a Bluetooth 2 SPP module then just about anything that says its Bluetooth 2 SPP should work.
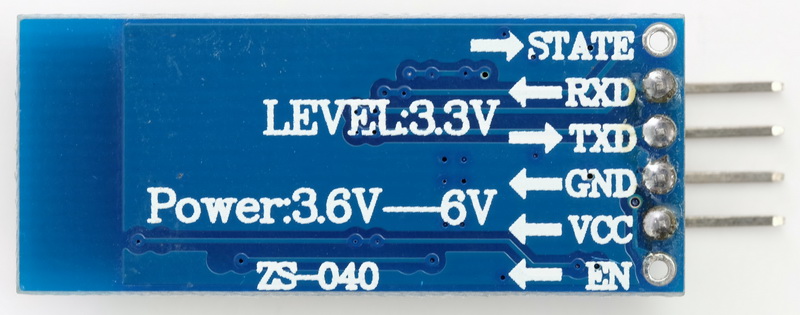
The actual HC-06 Bluetooth module is the smaller green SMD board. The blue board is a breadbaord friendly breakout boards. There are quite a few different break out boards and all are very similar.
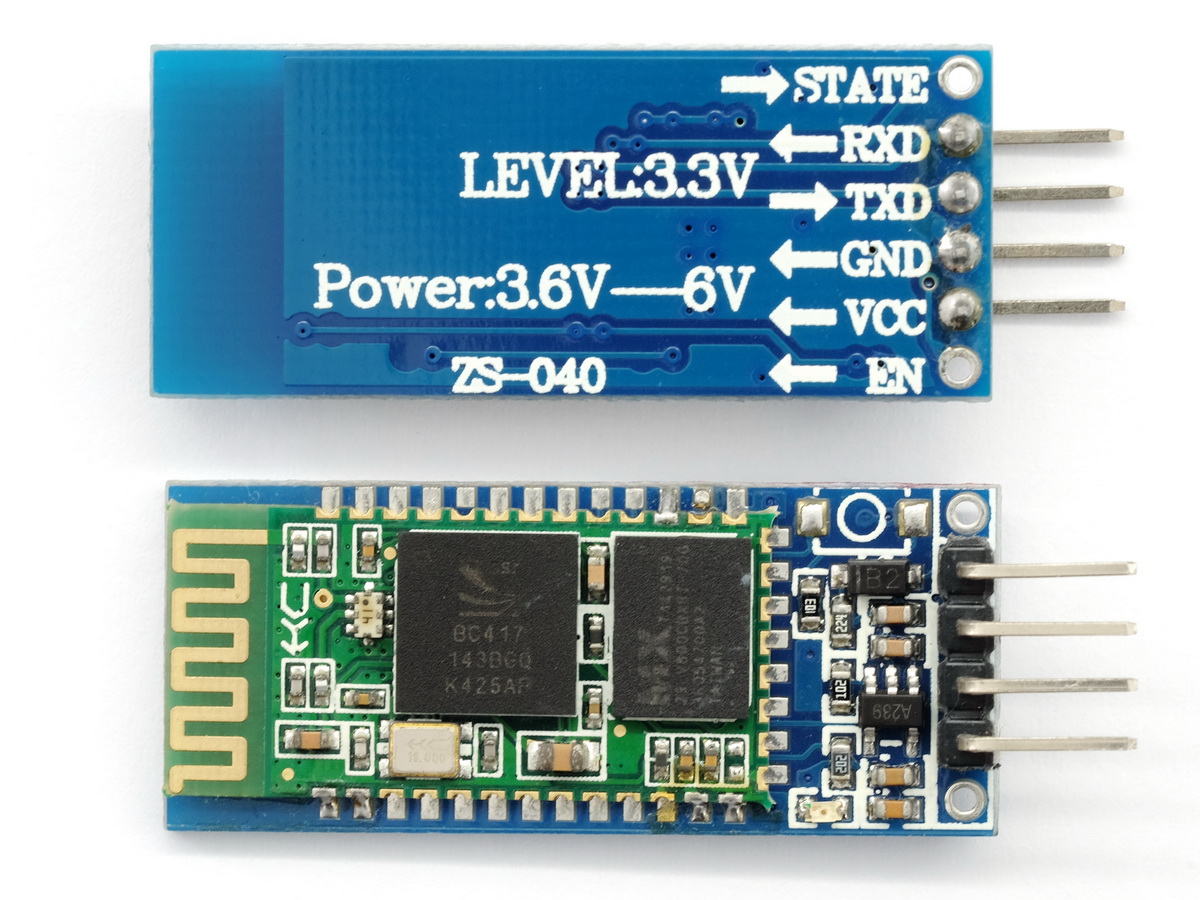
Older version with firmware linvorV1.8
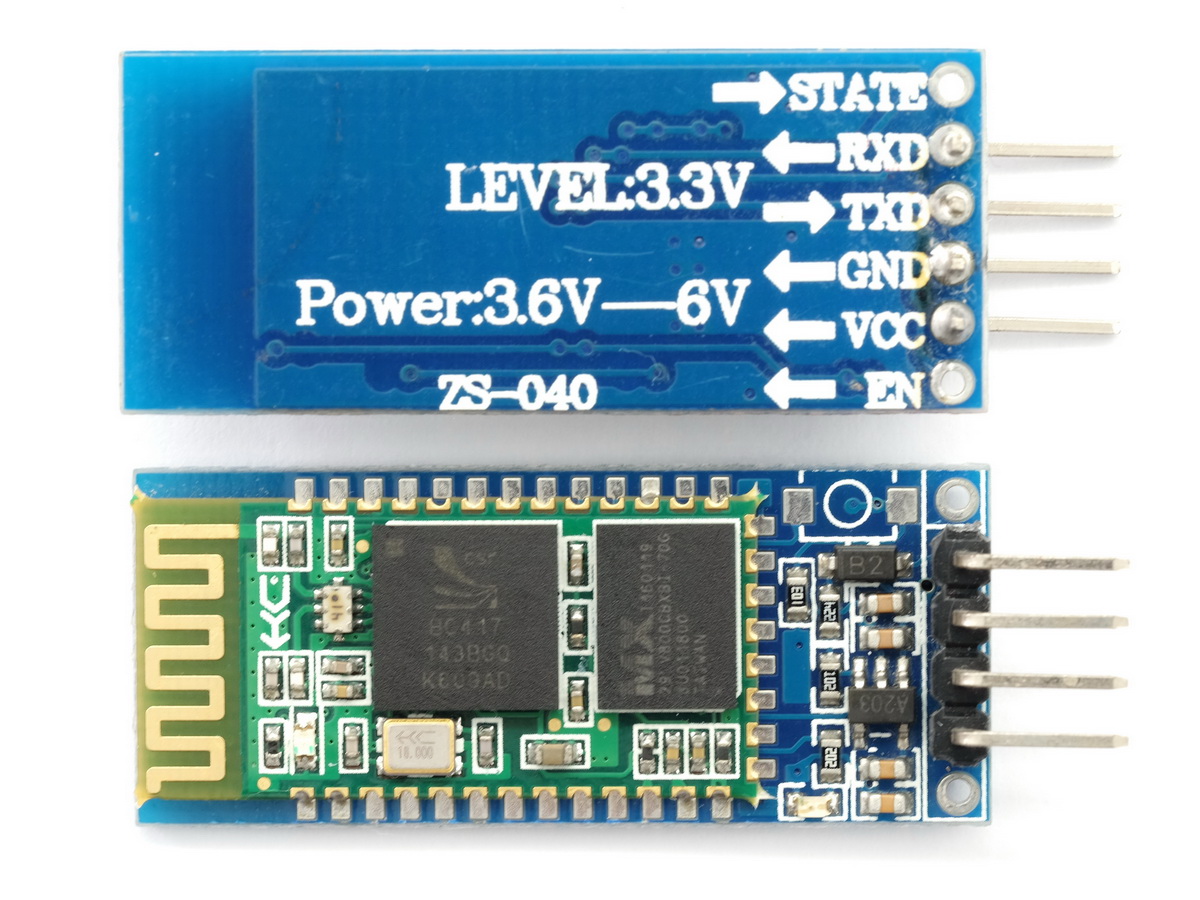
Newer version with firmware hc01.comV2.0
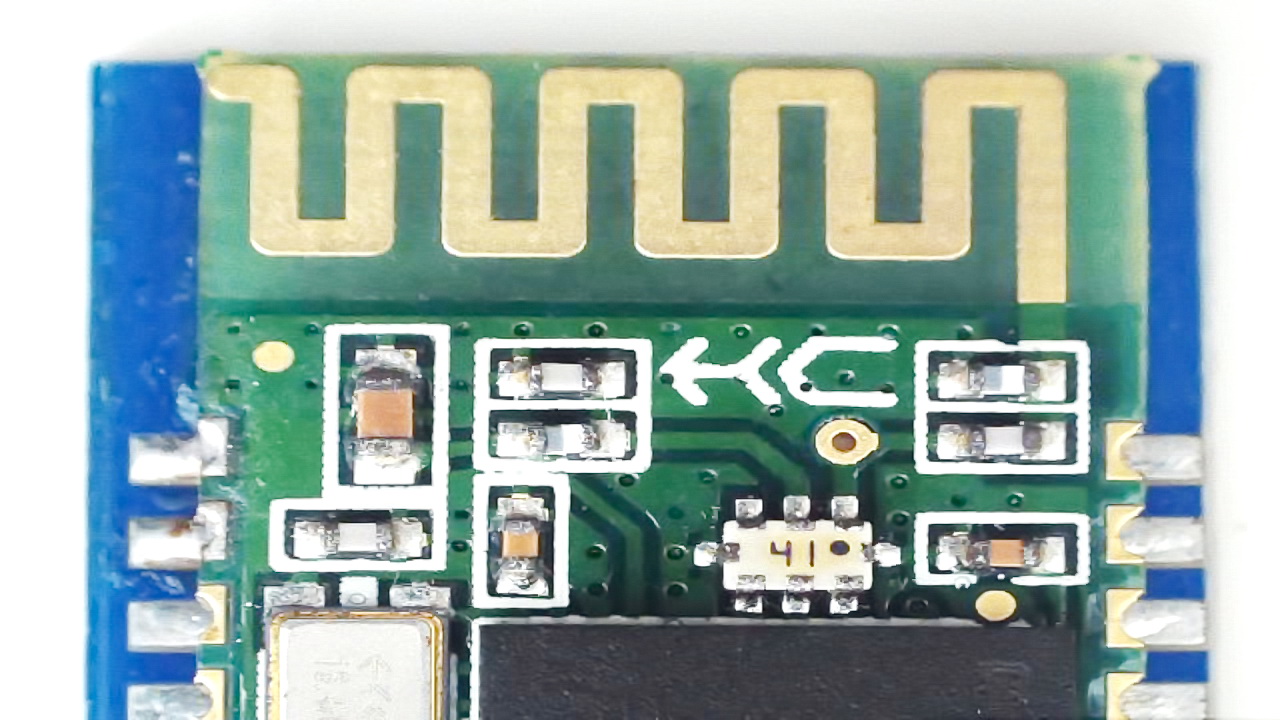
No LED
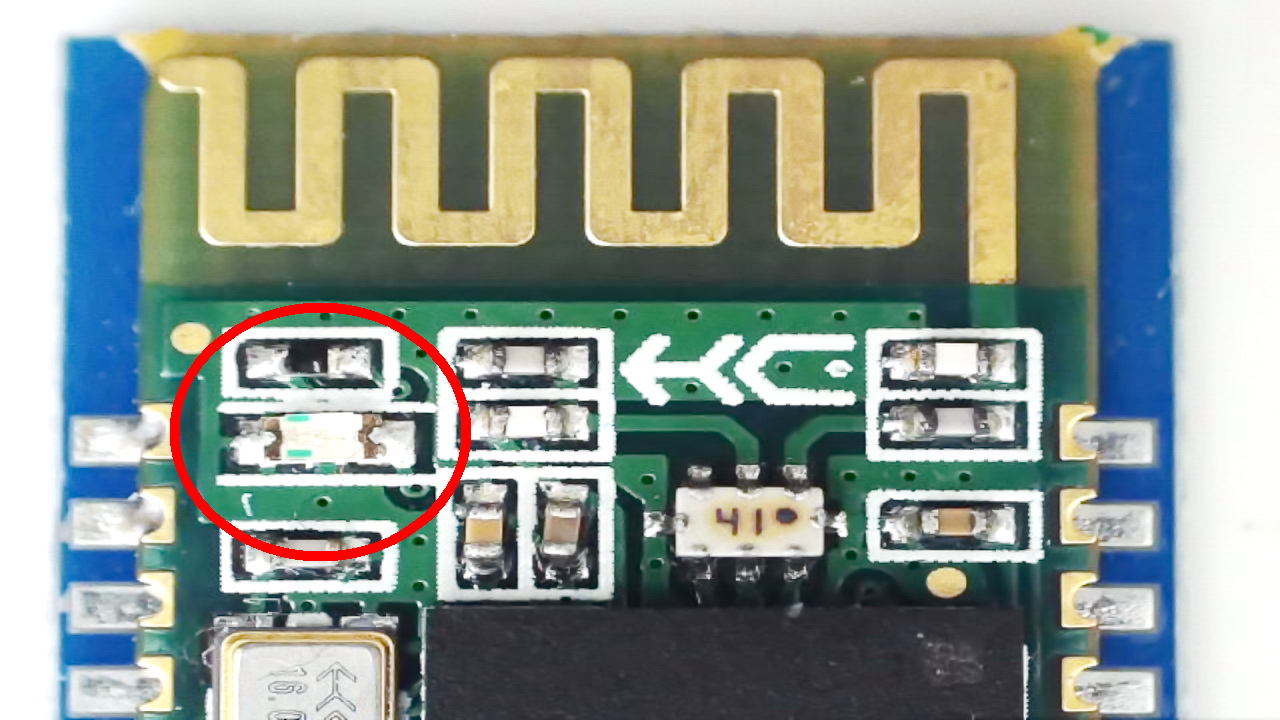
With blue LED
The very latest modules have the website URL across the top.
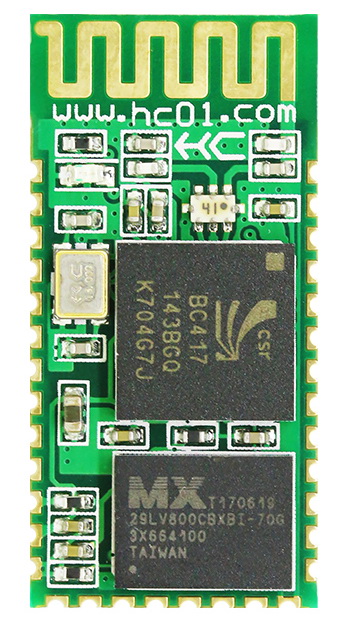
HC-06 Specifications
Slave only module
Bluetooth 2.0 EDR (Extended Data rate) 2Mbps – 3Mbps
Based on the csr BC417 chip
Firmware is linvor V1.8 or hc01.comV2.0
Default baud rate for serial UART is 9600
Default UART profile is 8N1
AT commands need to be uppercase without line endings
The default PIN / passcode is 1234
Data sheet V2.2 2011-04-06 for linvor V1.x (English)
Data sheet V2.3 2012-02-01 for linvor V1.x (Chinese)
Data sheet V2.0 2016-02-26 for hc01.comV2.00 (Chinese)
The Chinese data sheets are slightly more up to date.
hc01.com HC-06 product page
The product page has download links for the English data sheet and a HC-06 information package zip file. The information package contains utilities, sample apps and further information. Unfortunate it is all in Chinese.
HC-06 Information
The HC-06 is a Bluetooth 2.0 EDR device that has a serial UART layer on top of the Bluetooth. The UART layer makes them extremely easy to use but hides the Bluetooth functions from the user. This is good if all you want is to make 2 things talk to each other.
Bluetooth 2.0 is not compatible with IOS / apple products. If you need a Bluetooth module to connect to an IOS device then look for Bluetooth 4/5, or BLE.
HC-06s are slave only modules and require a master device to make a connection. Slave devices cannot initiate a connection which means you cannot link 2 HC-06s together. The master device, the one that creates the connection, can be a HC-05 or something like an Android phone/tablet.
The HC-05 looks very similar to the HC-06 but it has a more advanced firmware that allows it to be either a master or slave device. Since the price of the HC-05 and the HC-06 is basically the same I would suggest buying HC-05s and not HC-06s.
The HC-06 has 2 modes of operation; AT mode and transmission mode. When the modules are first powered on they go in to AT mode. Here AT commands can be entered via the wired serial connection. After a connection has been made the modules go in to transmission mode. In transmission mode everything the modules receives via the wired serial connection is sent wirelessly to the connected device. AT commands cannot be entered again until the connection is broken.
When the HC-06 is not connected wirelessly, the LED(s) blink quickly about 5 times a second. When a connection is made the LEDs stop blinking (turn on).
HC-06 AT Commands
The HC-06 starts in AT command mode on power on and expects commands to be uppercase without line endings (so no \r\n characters). The default baud rate for the serial UART interface is 9600.
The HC-06 does not have many commands, apart from setting the baud rate and renaming it, there isn’t a lot you can do to it.
| Command | Comment |
| AT | Communications test Returns “OK” |
| AT+VERSION | Check the firmware version ID Returns “linvorV1.8” or “hc01.comV2.0” |
| AT+BAUDx | Set the baud rate used for serial UART communication x = single digit hex value number from 1 to C: 1———1200 2———2400 3———4800 4———9600 (Default) 5———19200 6———38400 7———57600 8———115200 9———230400 A———460800 B———921600 C———1382400 Replies with OKxxxx where xxxx is the new baud rate. For example “AT+BAUD4” replies with “OK9600” Take care. Make sure you can use the baud rate before setting. |
| AT+NAMEnewname | Change the name of the module Replies with “OKsetname” The maximum length is 20 characters. You may need to reset the module before the new name is broadcast. |
| AT+PINxxxx | Change the PIN. The new PIN must be 4 numeric characters. |
| AT+PN | Set the parity to None. |
| AT+PE | Set the parity to Even. |
| AT+PO | Set the parity to Odd. |
| AT+LED0 | Turn the blue LED off (fw hc01.comV2.0 only). |
| AT+LED1 | Turn the blue LED on (fw hc01.comV2.0 only). |
| AT+ROLE | Change the Slave/Master working mode (fw hc01.comV2.0 only). AT+ROLE=S – set the module to slave (this is the default) AT+ROLE=M – set the module to master I have been unable to find a difference between slave mode and master mode on the HC-06. |
The baud rate and PIN cannot be interrogated so take care when setting. Although the PIN can be reset using AT commands you need to know the baud rate to use AT commands and there is no way to hardware reset these modules if you forgot what baud rate you changed it to!
Talking To A HC-06
Two simple ways to talk to the HC-06
- Use and Arduino with a serial pass through sketch
- Use a USB to serial UART adaptor
Use An Arduino with a serial pass through sketch
An Arduino can be used to talk to the HC-06 by using a simple serial pass through sketch. The sketch sends what ever it receives from hardware serial out through the software serial channel, and, what ever it receives from software serial it copies to the hardware serial.
Circuit
Arduino D3 (TX) to HC-06 RX via a voltage divider (5c to 3.3v)
Arduino D2 (RX) to HC-06 TX
GND to GND
Arduino 5v to HC-05 VCC INin
I am using a premade voltage divider.


The HC-06 I am using is 3.3v only on the RX pin. To be safe, I add a voltage divider between the Arduino TX and HC-06 RX pin to bring the voltage down from 5v to 3.3v.
Some newer boards are 5v tolerant on the RX/TX pins and do not require the voltage divider.
Arduino Sketch
/*
 *  sketch: SerialPassThrough_SoftwareSerial_Basic
 *  martyncurrey.com
 *
 *  Use software serial to talk to serial/UART connected device
 *  What ever is entered in the serial monitor is sent to the connected device
 *  Anything received from the connected device is copied to the serial monitor
 *
 *  Pins
 *  BT VCC to Arduino 5V out.
 *  BT GND to GND
 *  Arduino D2 (Arduino RX) goes to module TX
 *  Arduino D3 (Arduino TX) goes to module RX. May need a voltage divider.
 *
 *  Assumes a 5V Arduino is being used
 *  If the connected device is 3.3v add a voltage divider (5v to 3.3v) between Arduino TX and device RX
 *  Arduino RX to device TX does not need a voltage divider. The Arduino will see 3.3v as high
 *
 */

#include <SoftwareSerial.h>
SoftwareSerial softSerial(2, 3); // RX, TX

char c=' ';


void setup()
{
    Serial.begin(9600,SERIAL_8N1 );
   Serial.print("Sketch:   ");   Serial.println(__FILE__);
    Serial.print("Uploaded: ");   Serial.println(__DATE__);
    softSerial.begin(9600);
    Serial.println("softSerial started at 9600");
    Serial.println("Ready");
}


void loop()
{
    // Read from the Serial Monitor and send to the UART module
    if (Serial.available())
    {
        c = Serial.read();
         softSerial.write(c);
    }

    // Read from the UART module and send to the Serial Monitor
    if (softSerial.available())
    {
        c = softSerial.read();
        Serial.write(c);
    }

} // void loop()
Use A USB to serial UART adaptor
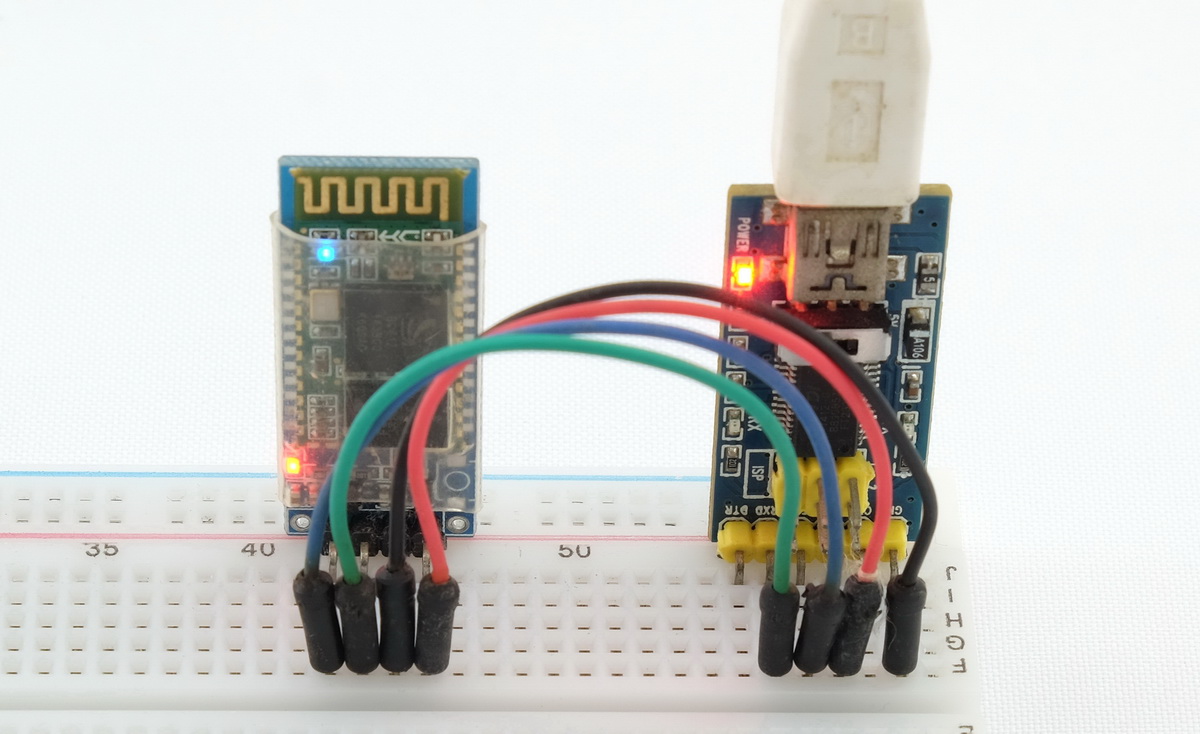
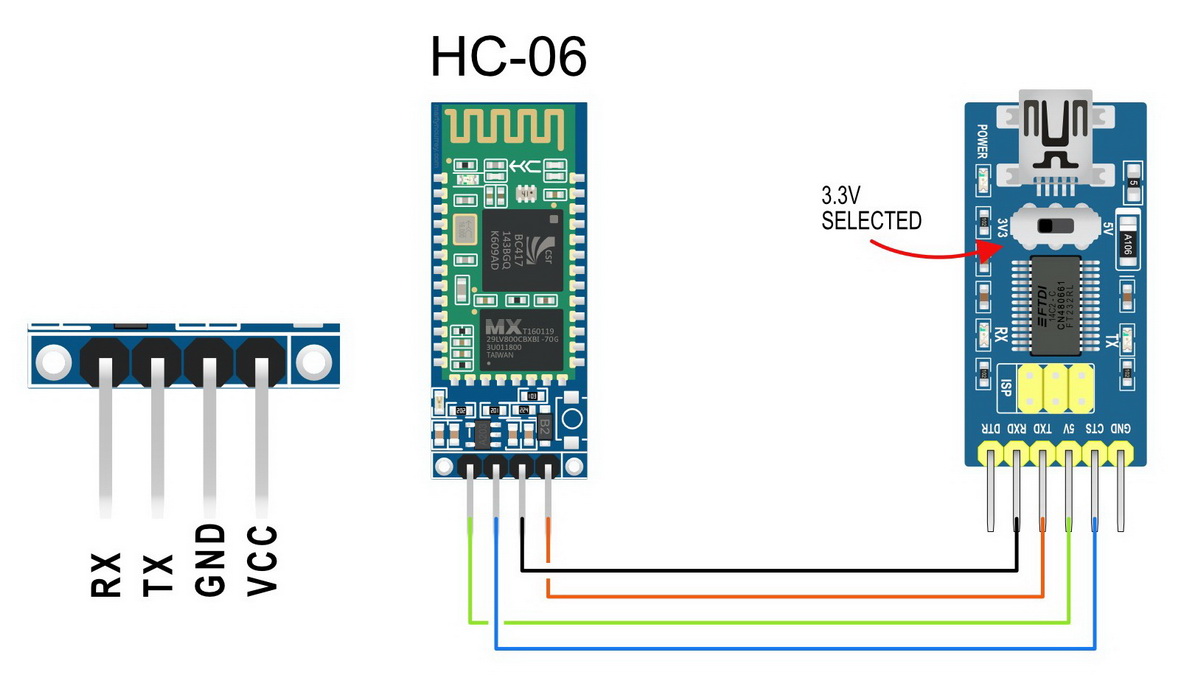
I am using a USB to serial UART adaptor that can be set to 3.3v, therefore, a voltage divider is not required.
Circuit
HC-06 RX to adaptor TX
HC-06 TX to adaptor RX
HC-06 VCC IN to adaptor 5v out
GND to GND
Check the HC-06
Set up the HC-06 and power on. The LED(s) should be quickly blinking about 5 times a second.
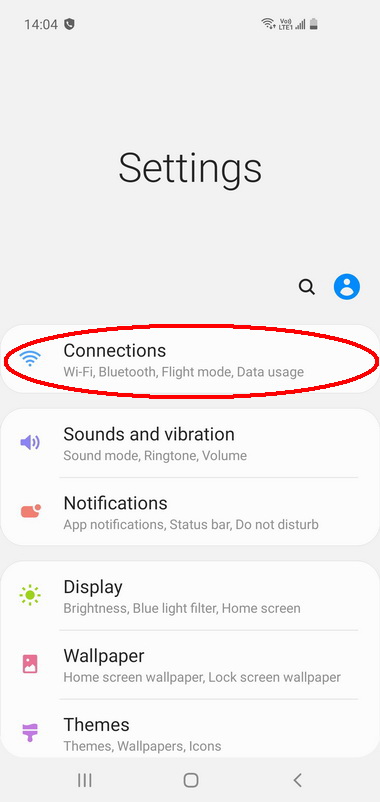
On an Android mobile device (I’m using a Samsung phone) open Settings and click Connections
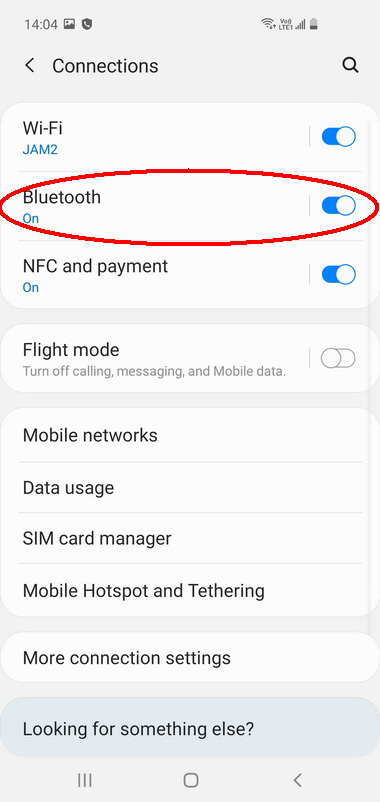
Make sure Bluetooth is turned.
Click Bluetooth.
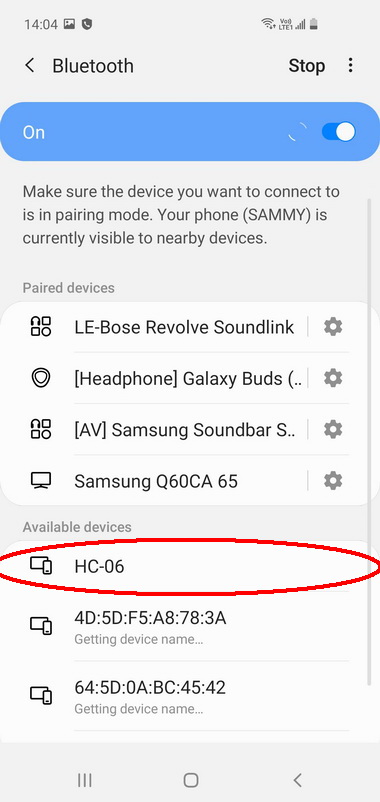
Start a Scan. After a few seconds you should see the HC-06 (or something similar) appear. I have a newer module that appear as hc01.com.
This guide concentrates on the AT commands. but if you are interested in using the mobile to talk to the HC06 have look at https://www.martyncurrey.com/bluetooth-serial-app/.
To talk to the HC-06 I am using an Arduino with Simple Serial Monitor. This is similar to the Arduino IDE Serial Monitor but has a few extra functions. You can download Simple Serial Monitor here or you can use the Arduino IDE. Both will work fine.
With the Arduino and HC-06 powered up, open Simple Serial Monitor. Set the baud rate to 9600 and select No Line Ending
Select the Arduino COM port and click the little red CONNECT BUTTON
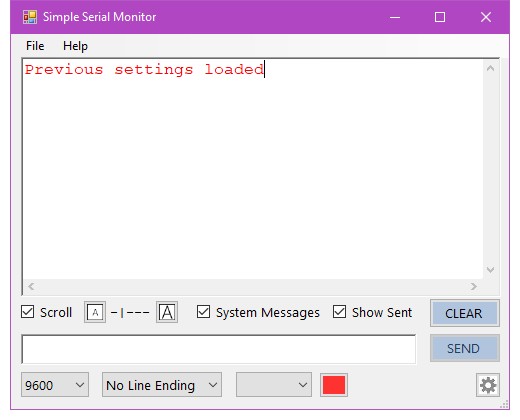
The app should connect with the Arduino and you should see the welcome message.
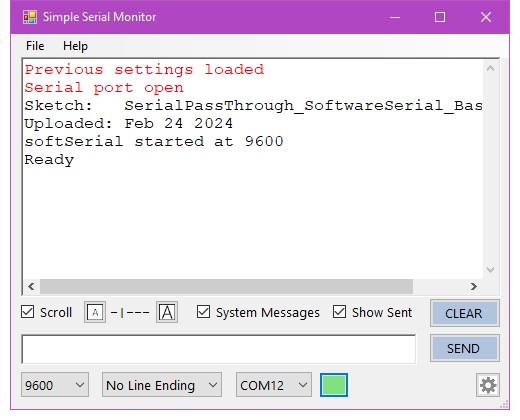
AT
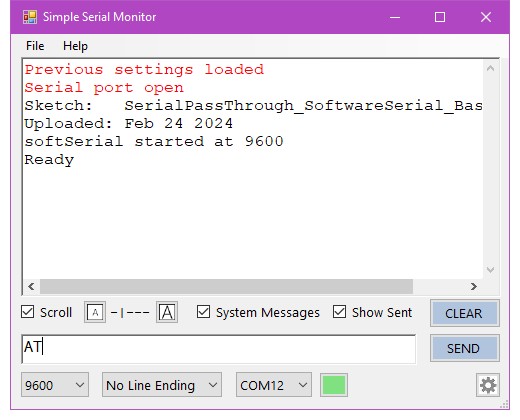
To check that everything is connected correctly we can use the AT command. This is a communications check and does not set anything. The HC-06 simply replies with an OK.
In the text box at the bottom. Enter AT and click Send
The Hc-06 should replay with an OK
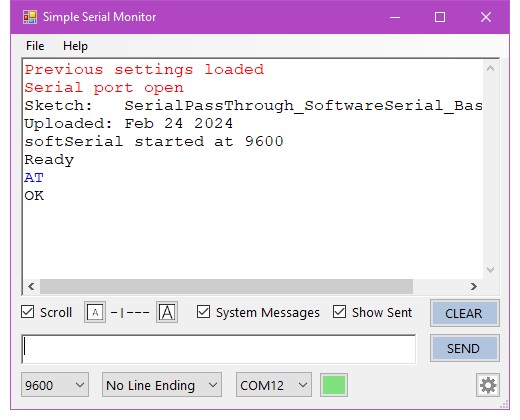
Simple Serial Monitor shows the sent command in blue in the main window.
AT+VERSION
To check what firmware the HC-06 has, use AT+VERSION
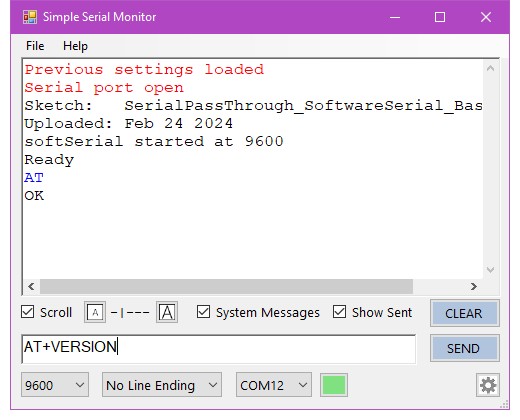
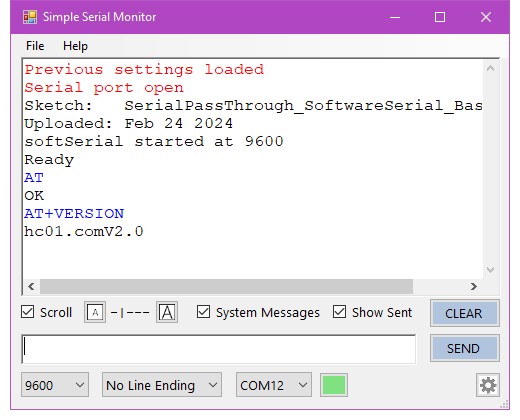
The HC-06 I am using in this guide has firmware hc01.comV2.0.
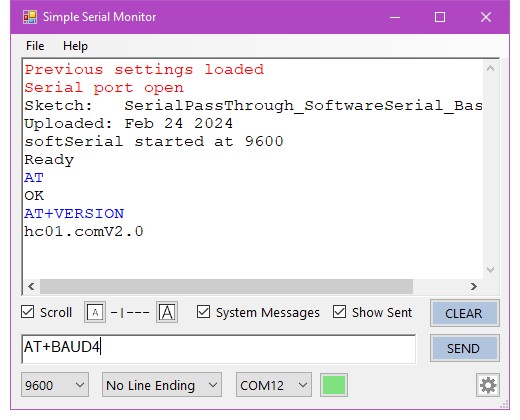
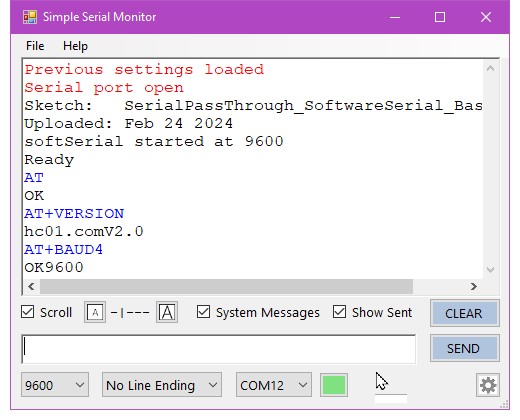
AT+BAUDx
AT+BAUDx changes the baud rate used by the modules serial UART layer. Use with care. There is no hardware reset if you get it wrong.
If you are using an Arduino with software serial don’t go above 38400 as this is the upper limit of how fast software serial can go.
AT+BAUD4 sets the baud rate to 9600
AT+NAME
AT+NAME allows you to set a new name for the HC-06. This is the name broadcast over Bluetooth. Here I change the name to Sensor1.
Note: you may need to cycle the power to the HC-06 before the new name is shown.
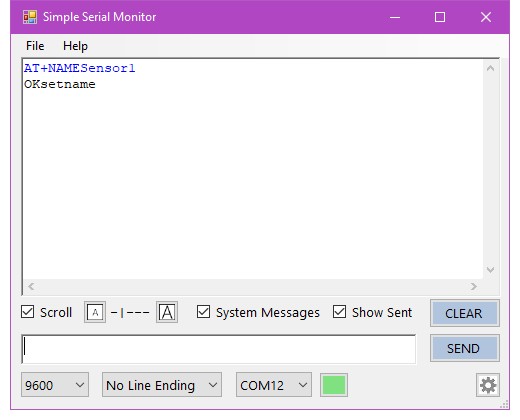

Use an Android device to confirm the name has changed.
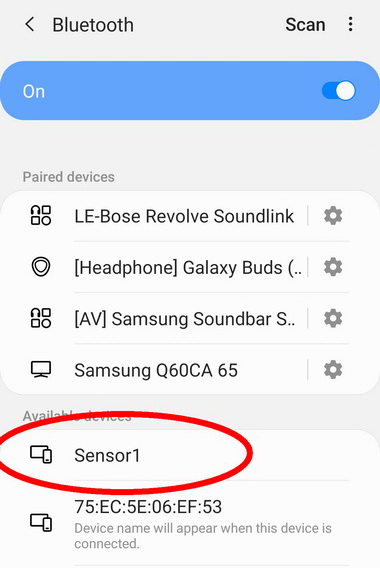
Depending on the device doing the scan, it may take a short while for the name to change
AT+ROLE
Firmware hc01.comV2.0 introduced the AT+ROLE commands. The commands are accepted by the HC-06 but I have been able to find out what Master mode does (if indeed it does anything). Slave mode and Master mode seemingly act exactly the same.
Final Thoughts
I used to use a lot of the official HC-06 and HC-05 modules but a few years ago the prices started to rise and they became fairly expensive and I started to look for alternatives. There are cheap non official HC-06 and HC-05 modules available.
In my experience, all the cheap HC-06s have been fine, and if all you need is a regular SSP Bluetooth module then you don’t even need the HC range. The much cheaper modules, such as the JDY-31, work fine. If you want to keep with official HC modules then the HC-02 and the HC-07 are good options (I have started using HC-02s in the dropControllerV3 controller).
HC-02 is Bluetooth 2.0 and Bluetooth 4, HC-07 is Bluetooth 2.0 only. Both offer similar AT commands at the Hc-06 (the HC-02 has a couple more).
Finding an alternative for the HC-05 is a little harder than for the Hc-05. There are many cheaper unofficial modules but you need to take care when buying them. Many have undocumented firmwares which can make then difficult to use.
Unless you absolutely must use Bluetooth 2 it’s probably better to move to Bluetooth 4 (or even BT 5). Bluetooth 4 is more widely supported although it can be slower for high volume data.
Good Morning Martyn,
I am not a programmer but have a Speeduino project running on an experimental Go kart, I have a phone mounted on the steering wheel for information when I’m using it around the race track.
The recommended baud rate is 115200.
Six months ago I programmed a hc-06 using a mega 2560, this was the first time, I think it went okay, but I was suffering from data freezing and disconnect from the speeduino (mega 2560). I carried out more research on the Arduino and phone dash app forums, and it could have been that my original AT set up require tweeking.
I purchased 5 new HC-06 (cheaper to bulk purchase from China) and proceeded to try to program from a mega, no luck, tried with an Uno, again no luck, I looked at various tutorials on youtube etc… I came across a reference to your tutorial, Plugged the Uno back in, loaded up your sketch and now both the simple serial monitor and the Arduino serial monitor talk to the HC-06.
Now to my issue,
I can AT command for info on version… Changed the name, but I couldn’t change the baud rate, AT+BAUDx would come back with and error however AT+UART would come back with 9600,0,0 I googled this reply and in some cases the UART command is used, I changed the BAUD rate by typing AT+UART=115200,0,0 I had the ? return and have now lost communication with the unit. I see that you say that soft serial has a speed limit. If I purchase a serial adaptor will I be able to use it at 115200, I just want to set up a HC-06 so I can talk to the speeduino without data problems, I have to get a stable connection before I sort other ini.file issues with the MSdroid,Realdash,Shadow Dash android apps.
Cheers
Darren
Hi Darren,
there are a few different versions of the HC-06 and some have slightly different commands. It looks like you have a non official version.
To use 115200 on the smaller Arduinos you need to use hardware serial, this is usually pins 0 and 1. Unfortunately, you cannot program the Arduino when the Bluetooth module is connected so you need to disconnect the HC-06, program the Arduino, re-connect the HC-06.
The larger boards, like the Mega, have more than one hardware serial which can make life a little easier.
For playing with these modules (and other UART boards) I find the USB to UART adapters invaluable and I feel it is well worth having a couple in the parts draw.