Note: Updating the firmware is non-reversable. Once you issue the OK+SBLUP command there is no going back.
There have been a lot of firmware updates since I originally did this post so I thought it was time to have an update. Updating the updating as you will.
One of the nice things about the HM-10 is that Jinan Huamao Technology update the firmware on a fairly regular basis and make all the tools and the latest firmware available from the download centre on their website. They also have a guide on uploading new firmware.
Th HM-10 update function has been available since firmware V508. Like the Arduino, the HM-10 has a built in boot loader that does the heavy lifting and all that is required is the HMSoft uploader program. There are no version checks and you can freely upgrade or upgrade as you wish.
Like the Arduino, the HM-10 has a boot loader that makes uploading new firmware fairly straight forward. You will need a Windows PC and a USB to serial UART adapter though.
The module I am updating currently has firmware V549 and I want to upgrade to V710.
Tools required
– Windows PC.
– USB to serial UART adapter.
– If your UART adapter is 5V only then adda couple of resistors to form a voltage divider (1K and 2K).
– Firmware zip archive.
Why Do I Need A USb To Serial UART Adpater?
An Arduino with a software serial library is not fast enough to upload the firmware. The HMSoft uploader app uses 115200 when uploading and software serial libraries cannot handle this speed.
Get The Firmware File
Go to the Jinan Huamao Technology website download Centre,
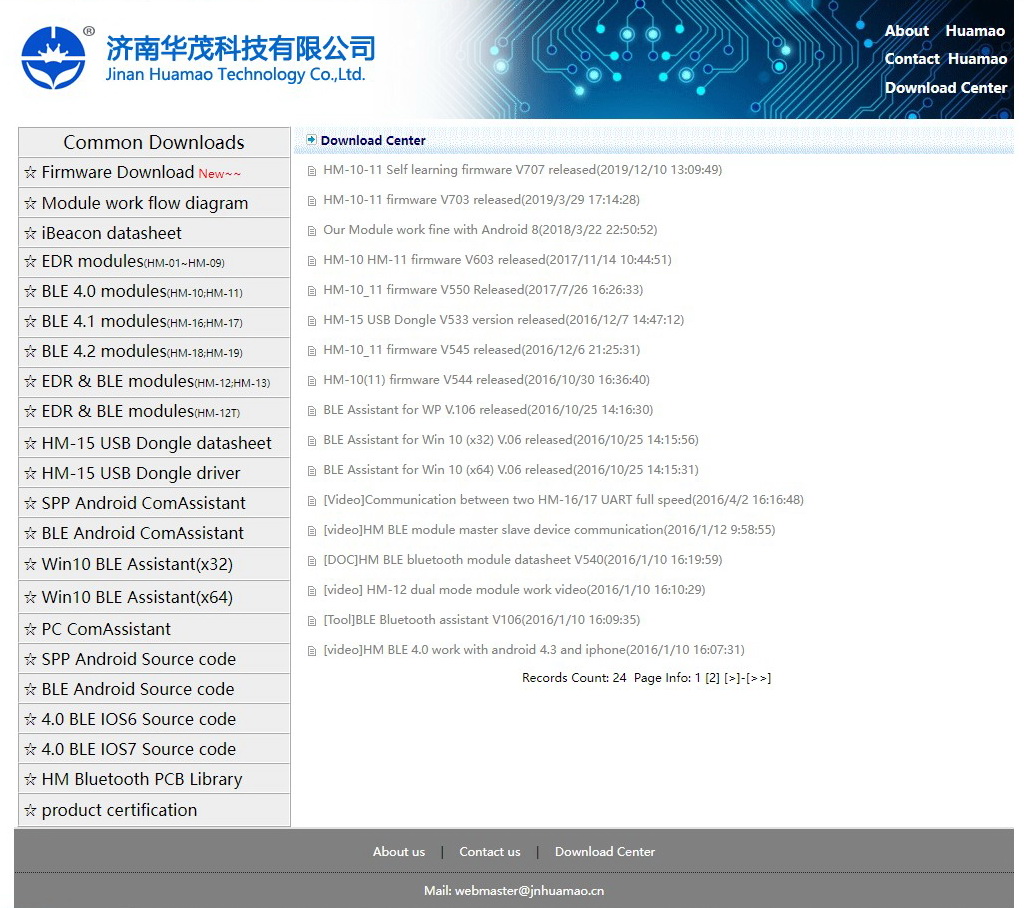
then click Firmware download.
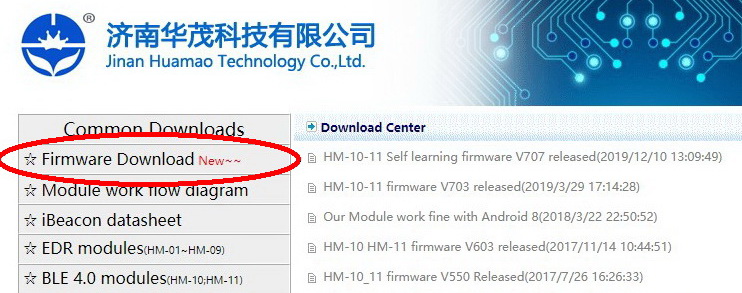
Download the latest HM-10 firmware, place it somewhere convenient such as your desktop.
I am downloading the one shown as V710.
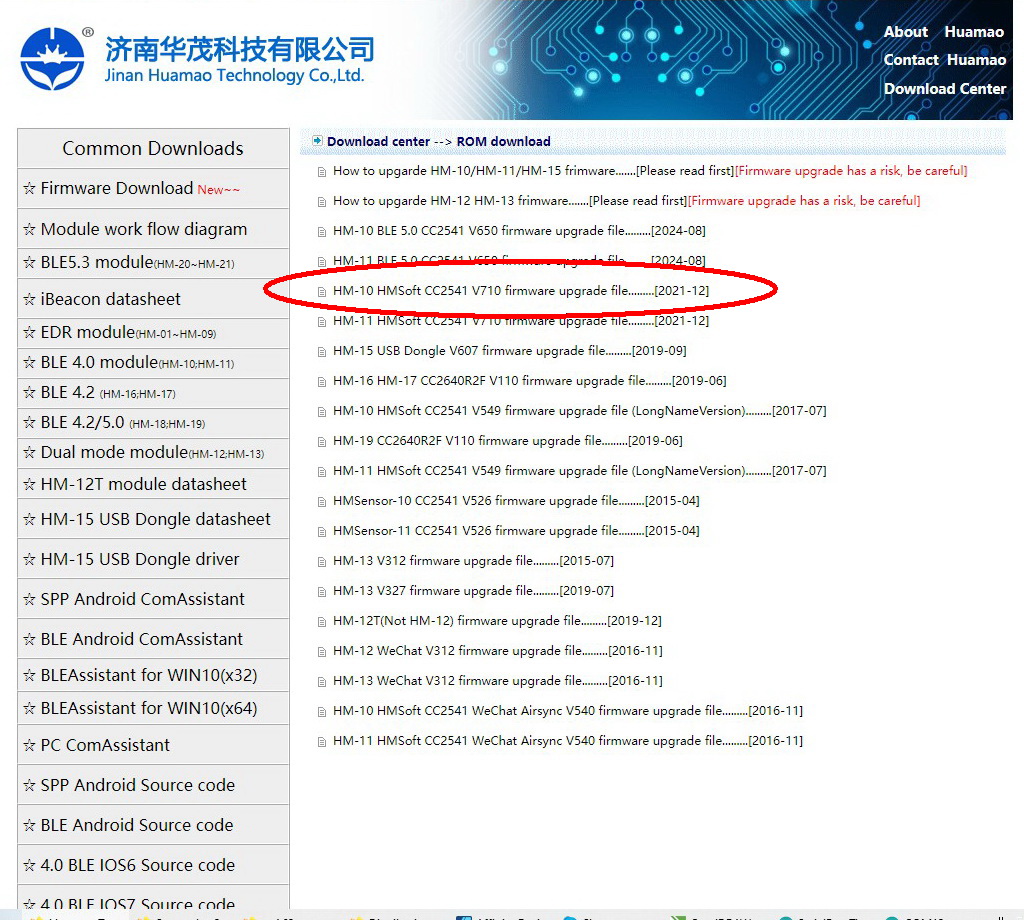
Unpack the zip file, inside you find a folder named V709 but the firmware is actually V710. The changes in the readme only go to V709 though.
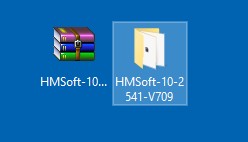
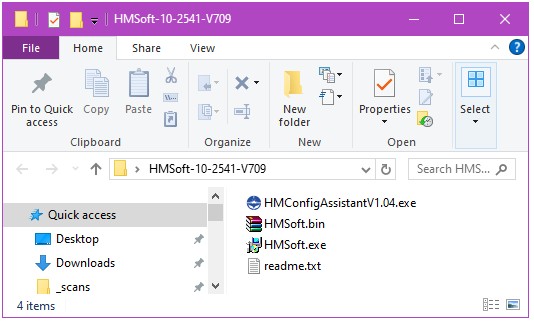
Inside the folder there should be four files:
– HMConfidAssistantV1.04.exe
– HMSoft.bin
– HMSoft.exe
– readme.txt
HMConfidAssistantV1.04.exe is a program that can change some of the HM-10 properties.
HMSoft.bin is the firmware file.
HMSoft.exe is the firmware upload program.
readme.txt is a readme that contains a list of all the changes
We are interested in HMSoft.bin and HMSoft.exe.
Note: The firmware for the CC2540 and the CC2541 chips are not the same. You cannot load the CC2540 firmware on the CC251 chip.
All the HM-10s I have use the CC2541 chip and the only firmware available on the Jinan Haumao website is for the CC2541 chip but it is still worth double checking.
Connect The HM-10 To A PC
The HM-10 is a 3.3V device, however, if it is on a breakout board like the ones I am using, then the VCC/power will be 5V compatible. The RX pin is still only 3.3V and you should not really connect it to 5V (I know people do but why be crazy!!!).
There are quite a few different USB to serial UART adapters and these can be put in to two groups; 5V only, 5V / 3.3V switchable.
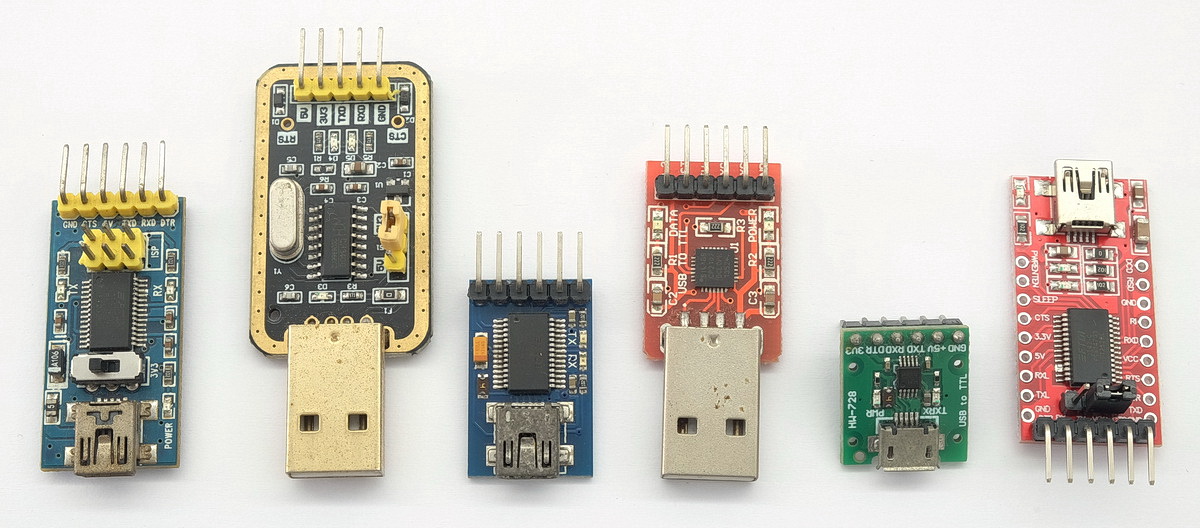
If your adapter is switchable then select 3.3V. If not, you should add a voltage divider on the adapter TX pin.
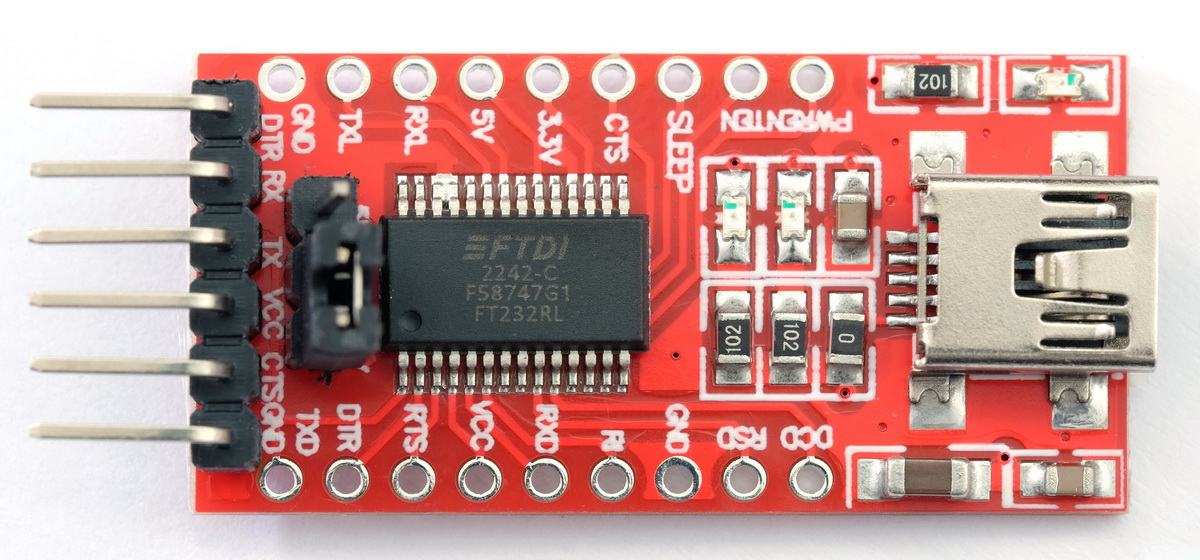
The adapter I am using for this post is based on the FTDI FT232RL chip and is 5V or 3.3V selectable via a jumper.
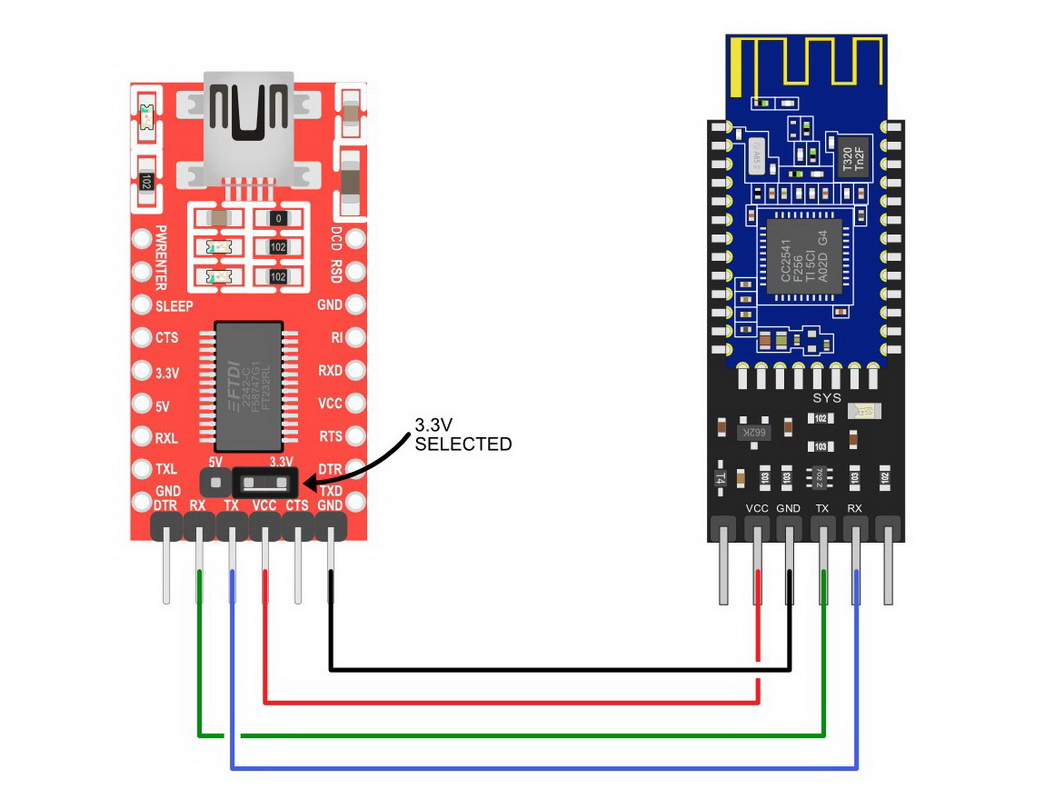
Circuit: 3.3V or 5V Switchable Adapter
Simple circuit.
– Set the adapter to 3.3V
– Connect adapter RX to HM-10 TX
– Connect adapter TX to HM-10 RX
– VCC to VCC and GND to GND
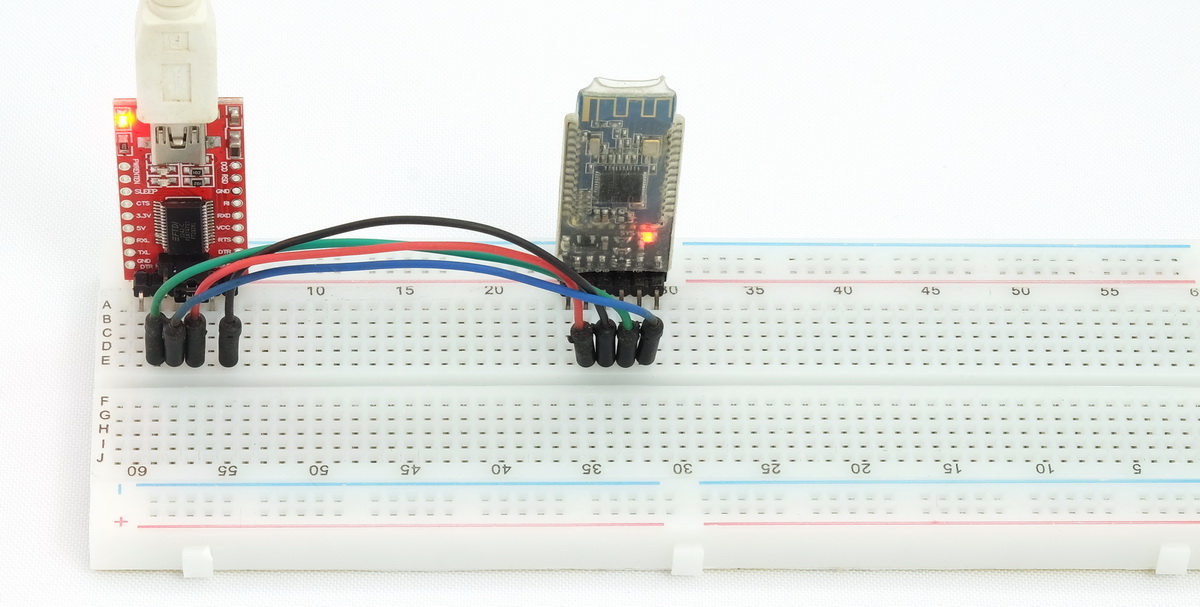
Circuit: 5V Only Adapter
If you are using a 5V only USB to serial UART adapter, add a voltage divider.
Simple circuit.
– Set the adapter to 3.3V
– Connect adapter RX to HM-10 TX
– Connect adapter TX to HM-10 RX via a voltage divider
– VCC to VCC and GND to GND
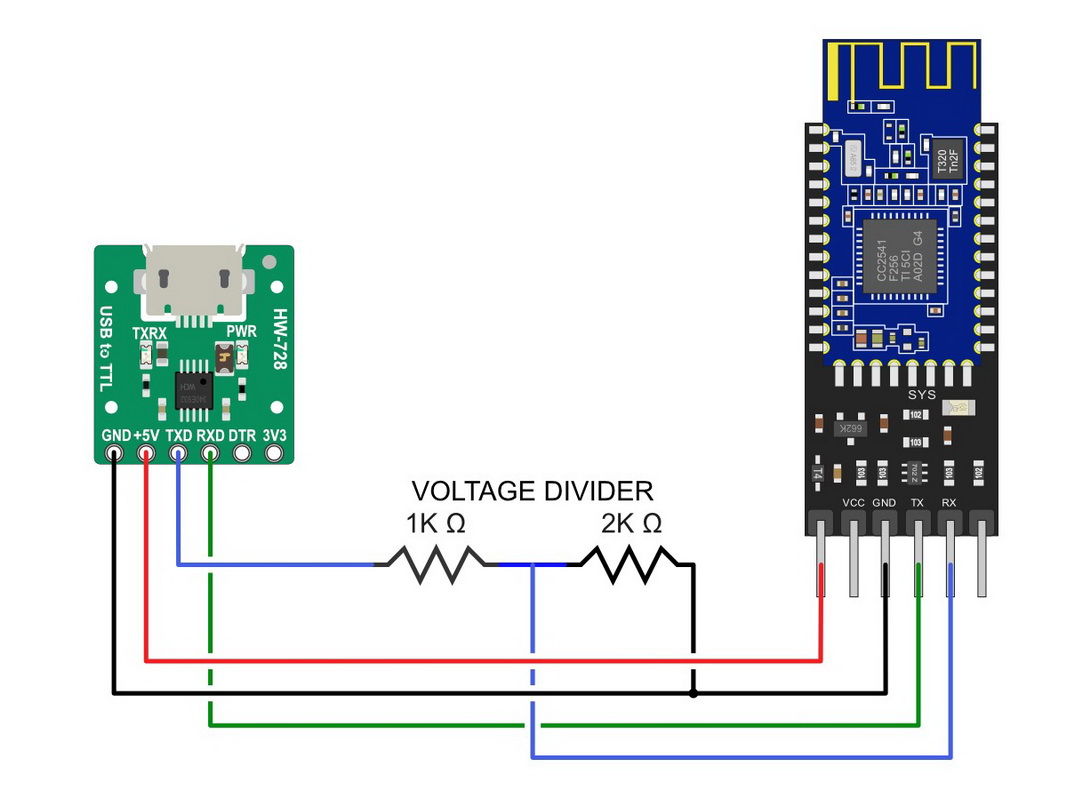
Even though this USB to serial UART adapter has a 3.3V out, TX is 5V only.
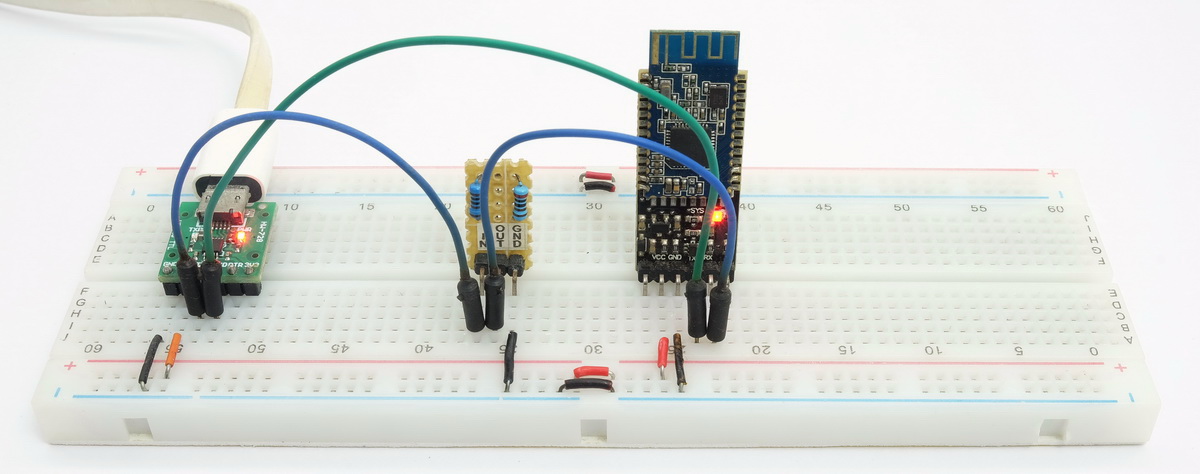
Talking to the HM-10 and uploading the new firmware is the same process regardless of which adapter you have.
Checking We Can Talk To The HM-10
After setting up the connections we need to check that we can talk to the HM-10. Any terminal app can be used but to keep it simple I generally use the Arduino IDE.
A couple of things to remember. I am using an old firmware (pre V700) so the HM-10 likes commands in uppercase and it does not like line endings.
Open the Arduino IDE and make sure the correct COM port is selected. On my computer this UART adapter is Port 11. You need to remember the port number for later. Better to write it down.
Open the serial monitor and select “9600 baud” and “No line ending” at the bottom.
To use the serial monitor a sketch is not required.
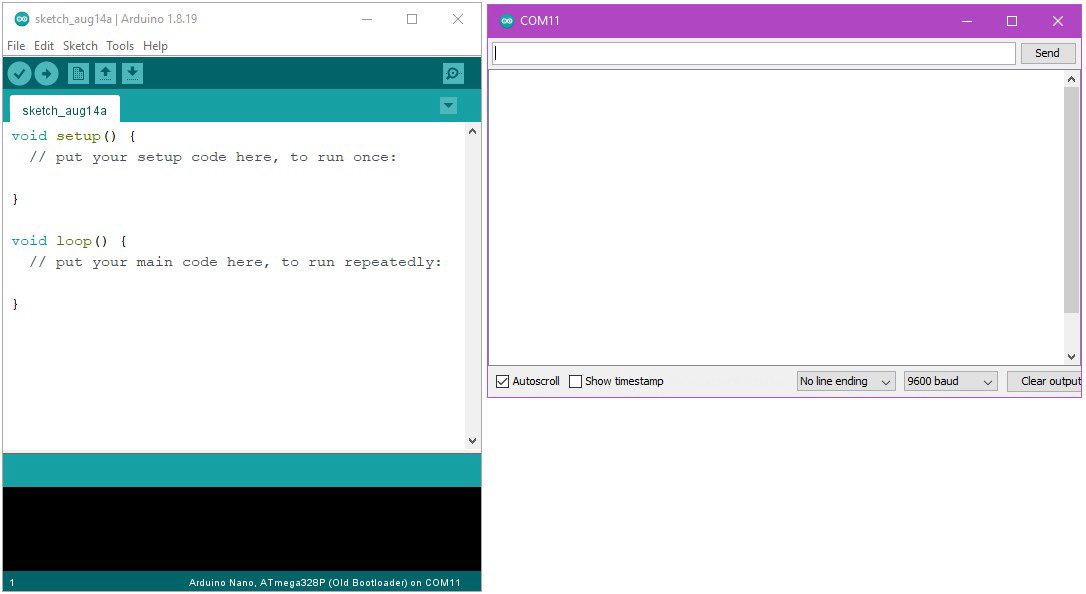
Enter AT and click Send. If the connections are correct you will get an OK.
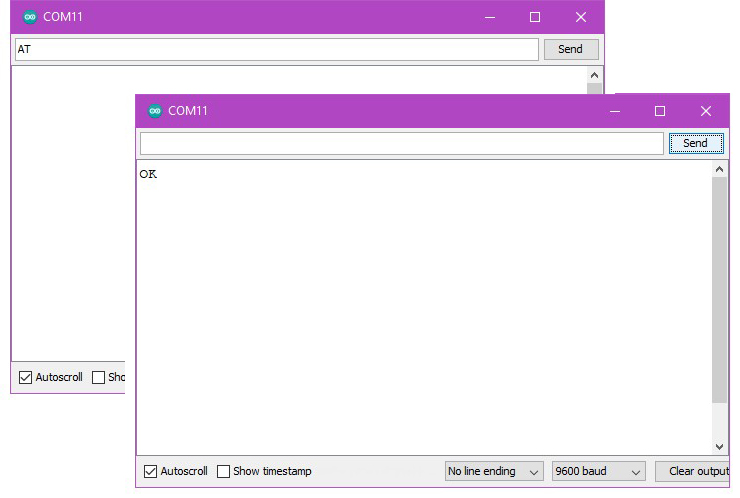
If you do not get the OK:
– Check you have the correct baud rate. The default is 9600.
– Check that you have “No line ending” selected at the bottom of the Serial Monitor.
– Check that you have the TX and RX connections the right way round.
– Check that you have the correct value resistors and that they are in the right order.
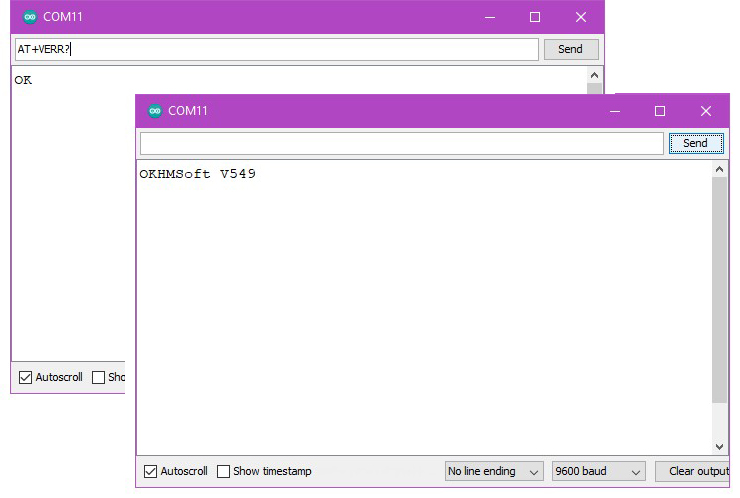
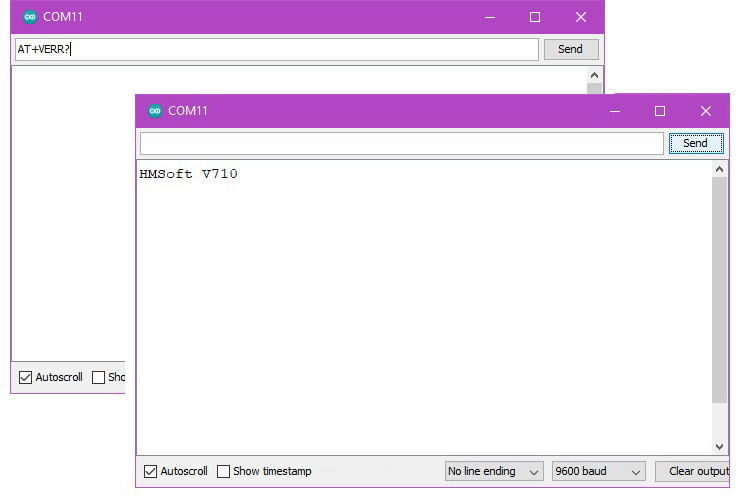
After checking that the connection is working double check the existing firmware version with AT+VERR?
Actually Updating The Firmware
To put the HM-10 in to update mode use the AT+SBLUP command. You should get a OK+SBLUP reply and the LED on the HM-10 will stop flashing be dimly lit.
AT+SBLUP is a one way command. When the HM-10 enter upload mode it don’t come out until a new firmware is uploaded.
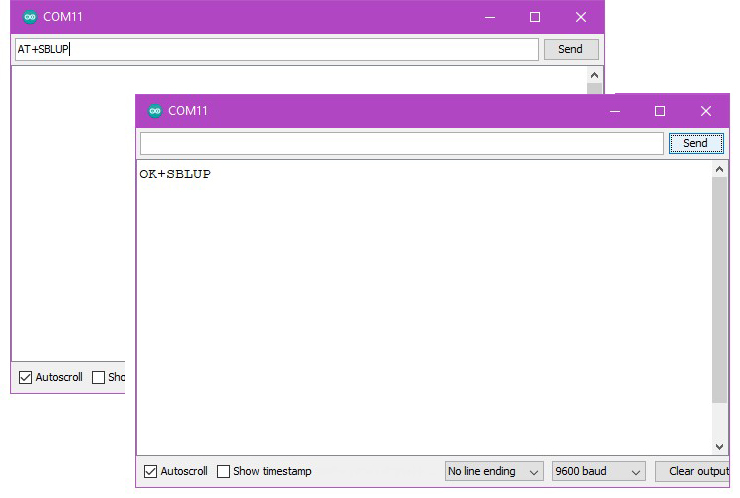
Close the serial monitor. You can’t use the uploader program while the serial monitor is using the COM port.
Open the folder containing the firmware files and run the HMSoft.exe file by double clicking it.
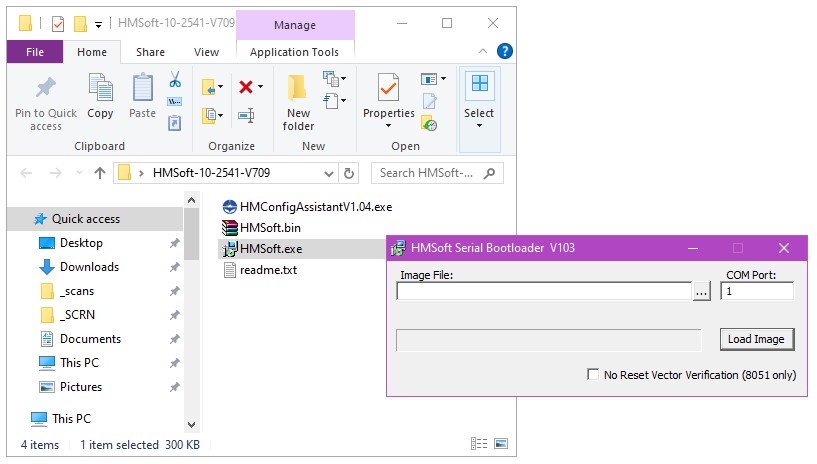
Load the bin file, enter the correct COM port number. You did write down the COM port number didn’t you?
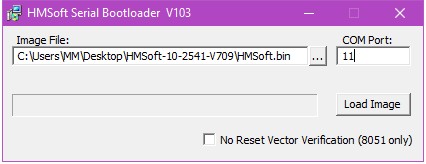
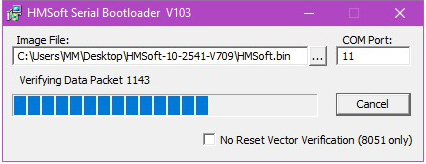
Hit the Load Image button. The firmware file is first written and then verified.

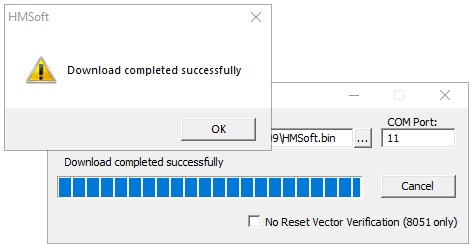
When finished the Download completed successfully dialogue box will pop up. The Hm-10 will reset and the LED on the HM-10 will start to flash again.
You can now close the updater app and reopen the serial monitor to check the new firmware version.
All done.
Trouble shooting the firmware update
If you start the update and nothing happens you have probably left the Arduino IDE open. You need to close it to free up the COM port. The update app does not give an error message if the COM port is not available. It just sits there.
When updating, if you get a timeout error, try again. If you keep getting the error your UART adapter is likely to blame. I have a couple that are not good at high speed (I suspect they have fake FDTI chips) and they give errors when uploading and/or verifying.
If you crash out and the LED on the HM-10 remains solid on. It means it is still in upload mode. It will remain in upload mode even after cycling the power. Just start the update again using the updater app.
Hi,
Is there any way of adding bootloader to the original firmware provided by the manufacturer as it is provided without?
Original firmware have only 248KB (full firmware has 256KB).
Thanks
http://forum.arduino.cc/index.php?topic=393655.0
Hi Martyn,
I’m already on v540 on a HM-10 clone (from the first post in the thread). This is the one with the full firmware.
Meanwhile, there are newer firmware versions available (v550 is the last one) however they are only 248KB and the board is semi-bricked if flashing one of those. It can be flashed back to v540, though.
Adding bootloader to V550 (or newer versions, when released by the manufacturer) would allow to upgrade non-genuine boards.
Thanks
Once you have the full 540 firmware with the bootloader you can use the non bootloader firmwares to upgrade.
sorry for all of my posts … but my hm-10 is now stuck in fw download mode and i have no idea on how to get out of it
i use my own optically isolated ftdi based usb to 3.3 V interface board which also feeds the hm-10 on the other end of the wires with 3.3 V power
i know i don’t really need this optical isolation, but i always use it for years now and it always worked on everything … the power through feed is enabled with jumpers
i switched the module down from 56k7 to 9k6 baud and put into the fw load mode
the hm-10 led stays on, but the fw update pgm gets always into timeout
there is only one restriction with my ftdi board, the max supported baud is 57k6 which is limited by the optical isolators, but i’m running now on 9k6
any thoughts on how to get the hm-10 out of this fw upload mode
maybe some others might run into a similar situation
the only other observation i would like to mention was that my cpu chip did not have any readable info about 2540 or 2541 on it, but all other of my modules stated 2541
tx, cheers Klaus
The HM-10 will stay in this mode until a new firmware is successfully uploaded. I believe the upload baud rate is internal to the upload app and the HM-10 boot loader and is not effected by the user set baud rate.
I suspect the max speed on your board is not high enough. Do you have access to another usb serial convertor?
You can flash genuine HM-10 firmware on CC2541 make genuine HM-10 from CC41, see my site http://www.obddiag.net/ble-adventures.html
CHEERS! Just here sharing my experience that may help somebody reading comments, or maybe you (Martyn) could update the post with my hint!
Used a CC-41-a module (A.k.a “HM-10 clone”) which I flashed firmware+bootloader v540 from this guide:
https://forum.arduino.cc/index.php?topic=393655.0
Everything done with an Arduino MEGA without no voltage divisor for serial transmission (AFAIK thats risky, but I had no problem) and also using 5V as Vcc.
Then (trying to update it to v550 or higher) I ended up here looking for a solution with the “timeout error”, and your advise about UART and speed problem helped me to figure it out!
It was my Arduino sketch when doing Serial.begin(9600) ! Even when 9600 it’s the baud rate recommended, it looks like that’s too slow for the updating software! So I used 115200 as baud rate in the Arduino sketch and worked as spected!
Hope it helps
You saved my life. No single tutorial or article mentions that, what a shame. Genius!
Dear all,
we are working on HM10 and firmware version is 2.0.
We are trying to update the firmware using arduino but nothing reply from it.
We follow as same step as mentioned but still get same issue.
AT+HELP command not work so please suggest right direction what we do ?
thanks
ckp
The HM-10 does not have the AT+HELP command. To enter firmware update mode use OK+SBLUP. Please re-read the above.
Hello,
We are using HM10 and version is 2.0 so we need to update the firmware but
when we send command “AT+SBLUP” but get error resturn back.
need help to sort out issue.
Thanks
ckp
Are you sure you have a HM-10?
Hi Sir
i am using HM-10 BLE device and i want to upgrade firmware via Arduino so i getting error .I done this step
STEP 1 CCLoader.ino skecth upload with Arduino IDE
STEP 2 Connect HM-10 to Arduino WIth
STEP 3 open CMD and Wirte CCLoader.exe 9 HMSoft.bin 0 or 1
in Step 3 i will get Wait for Arduino respond and Nothing is Done
If you are using an original HM-10 you do not need ccloader just follow the instructions above.
Hi Sir
i am using HM-10 version 2 upgarde firmware so
i Done Send Command AT then replay is OK
but i Send command OK+SBLUP but no responce and
i open HMsoft.exe Load bin file but Error geting “”Timeout Waiting from target responce
It is possible the module is simply not responding. I had an older HM-10 where AT+SBLUP does not work.
What do you mean by version 2 though?
Hi Sir, AT+SBLUP is done but when I open HMsoft.exe Load bin file but Error geting “”Timeout Waiting from target responce. My hm10 is now waiting for update :(
hi,
i solve this problem with VCC 3.3V and TX RX digital level 3.3V
i wanted to update my firmware but and error occurs, “Timeout waiting for response from target”. please help thank you in advance
V6.06 of the HM-10 firmware is now available for download. http://www.jnhuamao.cn/download_rom_en.asp?id=1
Thanks for sharing this!
I wonder if it is possible to use higher than 230k baudrates. Also, have you tried using SPI instead of USART? (which, according to the IC datasheet, should support up to 4 MHz).
Although the hardware has some advanced features we are limited by what the firmware decides to offer.
Marty is the subject matter expert. Flashing upgrade was painless and content was applied 2018.12.30. No issues just green lights.
When trying to update the firmware I run into an error. I can select COM6 but then when I try to open the serial monitor I get “Error opening serial port ‘COM6’. (Port busy)”. COM6 is definitely the correct port as it only shows up when the board is connected. Has anybody else had this error?
Are you using an Arduino Nano? I had that problem when moving from a Mega2560 to a Nano 33 BLE. The Nanos appear to use two COM ports and I found that I had to set the right one when uploading.